Craftsmen in 18th Century Williamsburg

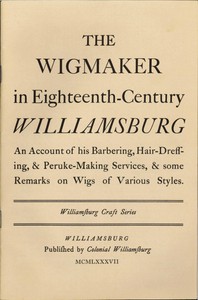
The Wigmaker in Eighteenth-Century Williamsburg by Thomas K. Bullock and Maurice B. Tonkin
The good people of Williamsburg, Virginia, have produced a series of booklets on craftsmen operating there during the 18th Century and generously made them publicly available on Project Gutenberg.
While my site is about 18th Century Britain, the technologies in the Old World and the New would have been much the same. I have extracted some of the more relevant material but I urge you to look at the complete publication. Click on the cover illustration to go to the Gutenberg page.
I have extracted here the detailed explanation of how to make a wig but there is more of interesting in the publication itself.
Making a Wig
The eighteenth-century wig was built up of rows of hair woven at the root ends to cross-threads, each row being then sewn to a net-and-ribbon skullcap or “caul.” The steps in making a queue wig would differ, of course, in some detail from those in making a wig without a queue. But the basic procedures in the eighteenth-century manner of perukemaking are the same for any style, and can be set forth briefly under the following seven headings:
(1) Taking the Measurements
The customer’s head (preferably shaved) is measured with a strip of paper about an inch wide, each measurement being recorded by a scissor-nick in the edge of the strip.
There are five essential dimensions to take:
(a) from the top center of the forehead over the head to the nape of the neck;
(b) from one temple to the other around the back of the head;
(c) over the top of the head from ear to ear (to the top of the ears for a wig “with ears,” i.e., with ears showing, to the middle of the ears for a half-eared wig, and to the bottom of the ears for a full-bottomed wig);
(d) from the middle of either cheek to the back of the head; and
(e) from the top center of the forehead to either temple.
(2) Preparing the Hair
Before it can be used in wigmaking, hair must be cleaned, arranged according to length, quality, and color, and curled.
Tied in small parcels, the hair is cleaned by thorough powdering with fine sand or mill dust from a flour mill; this absorbs the oil and grease from the hair and is then shaken out.
Next the hair is combed or carded through a “hackle” and separated into parcels of different lengths. The wigmaker’s vise, fixed to the table top in a horizontal position, holds each parcel of hair in turn (by the root ends) while the craftsman rolls the hair—in a curl-paper—onto curling pins made of pipe clay. These rolls he boils for three hours and then partially dries in a small charcoal oven.
The loaded curlers are then piled up, taken to the bakery, covered with a shell of rye dough, and baked in a moderate oven.
When the loaf is returned to the wig shop and broken open, the curls will have absorbed some moisture from the dough and must again be dried out in the charcoal oven.
Finally dried and cooled, the curled hair can be taken off the pins and combed out in the hackle, further separated by lengths if necessary, and the root ends of each parcel trimmed off evenly. If the hair is thin and needs to be filled out with horsehair, or if hair of different colors is to be mixed to achieve a desired shade, this is the time to do it.
(3) Making the Pattern
The wigmaker’s pattern is a weaving pattern; it shows how many rows of hair will be needed in a wig of the customer’s size, how long each row must be, and how long the hair in each part of each row must be in order to make a wig of the desired style.
On a piece of squared paper the wigmaker draws as many parallel lines as his measurements of the customer’s head tell him are needed. Each successive line will be longer or shorter, also, as may be necessary to fit the customer’s head. On each line—or portion of a line—he marks the length of hair he will use in that part of the wig. In determining this the wigmaker relies partly on his own experience, partly on pattern books or similar sources.
(4) Weaving the Hair
The rows of hair are woven on a simple frame of two upright posts holding three (or six) silk threads stretched tight.
The wigmaker takes several strands of hair by the root ends and weaves them around the silk warp threads, using one of a number of possible weaves. He continues weaving a few strands at a time, sliding the woven strands tight together until he has a strip of weft as long as the pattern calls for.
He winds the finished strip onto one post as more thread unwinds from the other, and does another row. If the frame holds six threads, the lower three are used for the right side of the wig (with the curl of the hair toward the weaver) and the upper three for the left side (with the hair curling away from the weaver).
(5) Mounting the Caul
From his assortment of hollowed out elm or ash wig blocks of different sizes and shapes the wigmaker selects the one that corresponds to the customer’s head measurements.
On it he outlines the proposed wig in inch-wide “mounting ribbon” of silk, carefully measuring, stretching, folding, and lightly tacking as he goes.
Then he fixes the ribbon firmly in place with strong thread stretched around two rows of small nails, called “wig points,” one row on either side of the ribbon.
Next he sews a fine net of cotton or silk to the mounting ribbon all around, with appropriate folds and tucks to fit the curvature of the wig block, and trims off the excess.
He then adds two strips of “covering ribbon” three and a half inches wide across the top of the wig, one from front to back, the other from side to side, basting them to the net and sewing them firmly to the mounting ribbon. He may add a drawstring or even a small strap and buckle at the back so the wearer can keep his wig on tighter.
(6) Sewing the Strip of Weft to the Caul
Following his pattern for length of rows and length of hair, the wigmaker now sews to the caul the strips of weft he has previously woven, using a simple straight stitch.
Except for the rows framing the face, which start at the front edge and go backwards, the rows are sewn beginning at the bottom and back and working upward and forward.
Rows of short fine hair are sewn very close together, the rest in parallel rows a quarter of an inch apart. Different styles, of course, may require a particular sequence of sewing the proper combination of short, long, curled, straight, or horsehair tresses to achieve the desired result.
(7) Finishing and Dressing the Wig
As the words imply, these processes call for the deft use of comb, fingers, curling iron, and scissors to trim and shape each curl and each bunch of straight hair to graceful perfection.
Finally, the wigmaker adds a rosette, a bag, or ribbons as the style demands, and pomade, powder, and perfume to the customer’s desire. The powder, incidentally, may be had in various colors and serves to maintain the wig in the proper shade or tint of brown, black, gray, or white. In fact, blue powder was not unknown.

